Go to the Logpoint Help Center and download the .ova file.
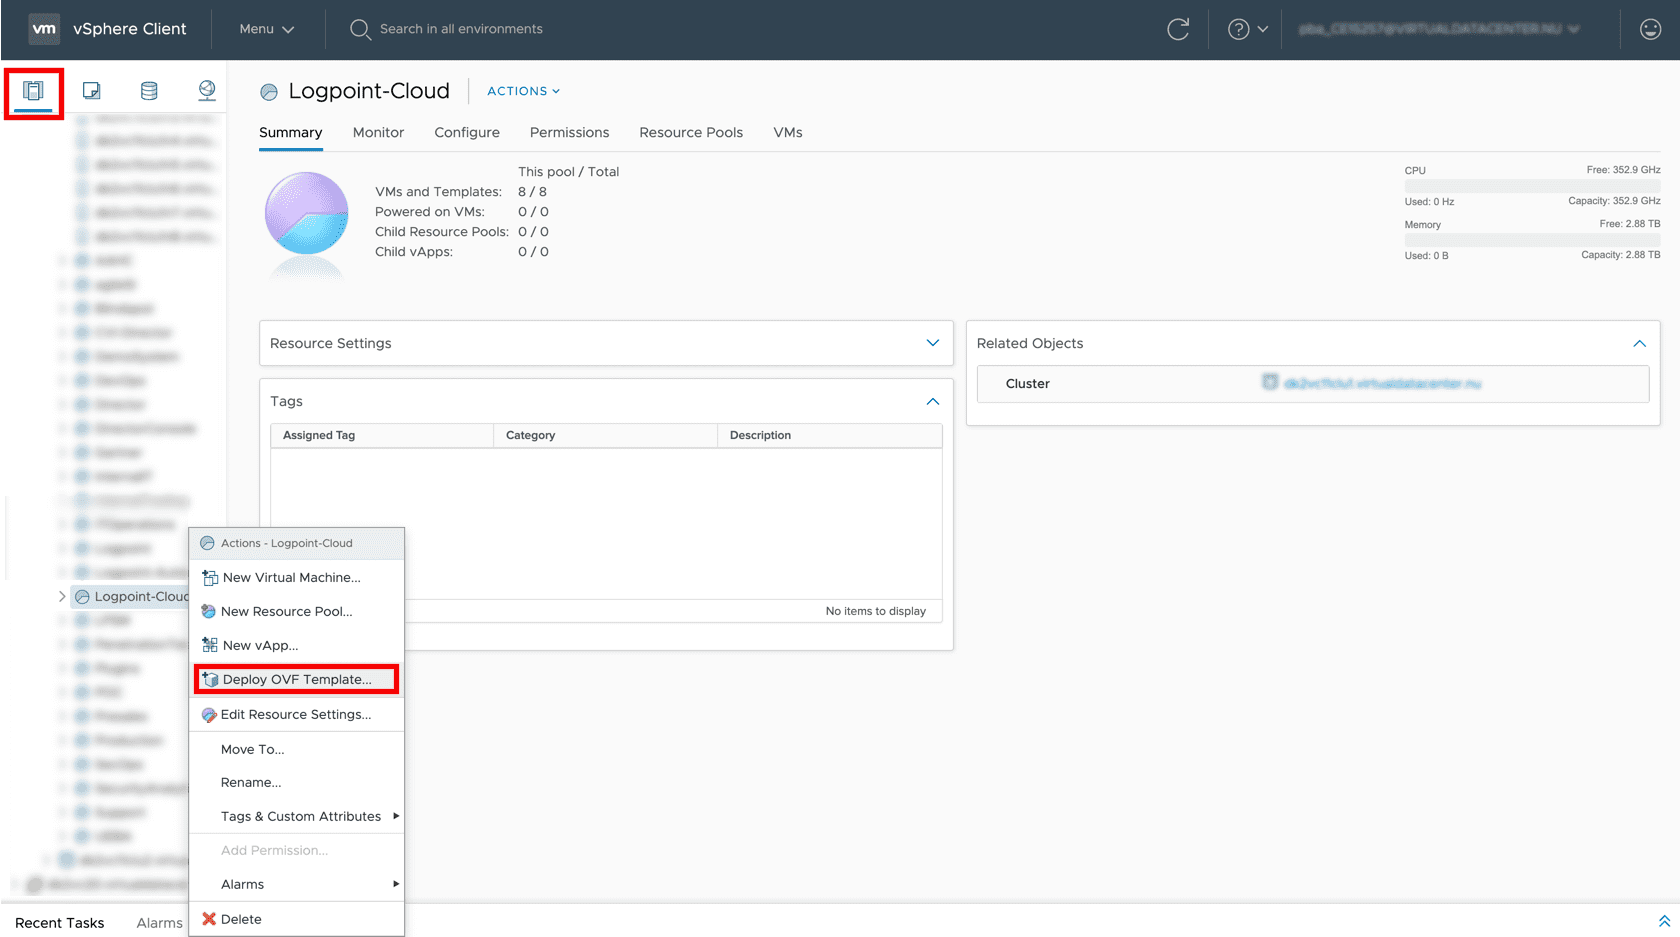
Log into your vSphere client.
Selecting the Deploy OVF Template option
Click the Host and Cluster icon.
Select the required resource pool to install the OVA.
Right-click the required resource pool and click Deploy OVF Template.
Selecting an OVA
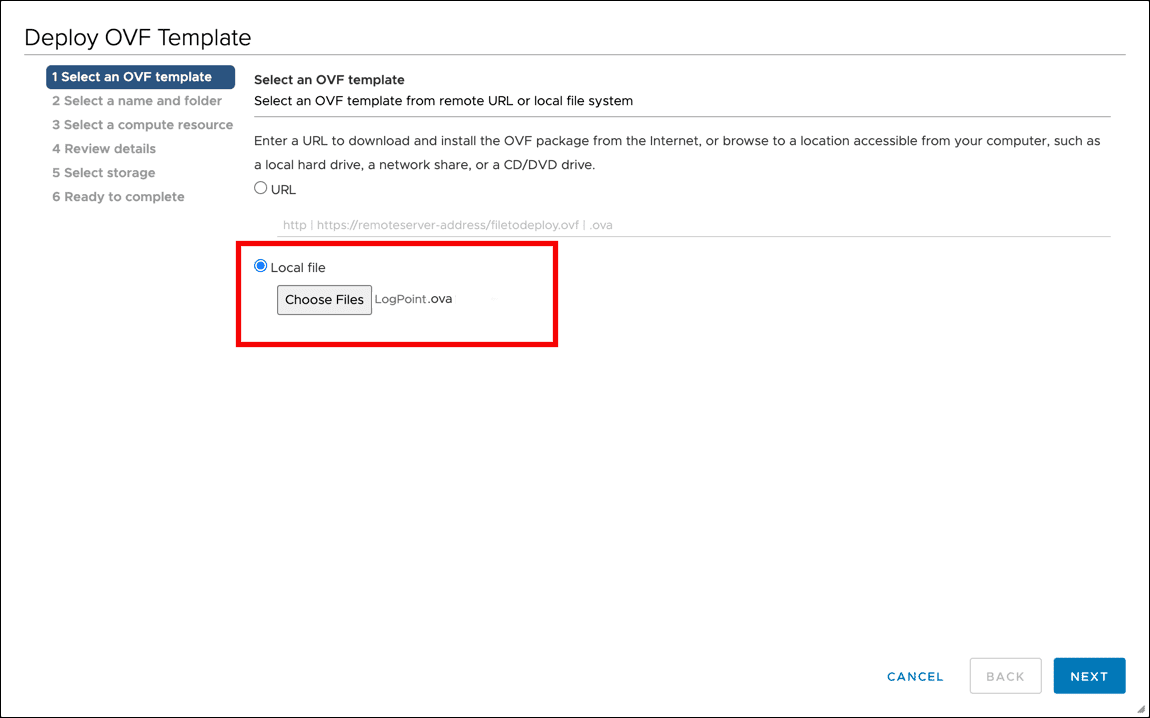
Select the Local file option.
Click Choose files and browse the OVA file.
Click Next.
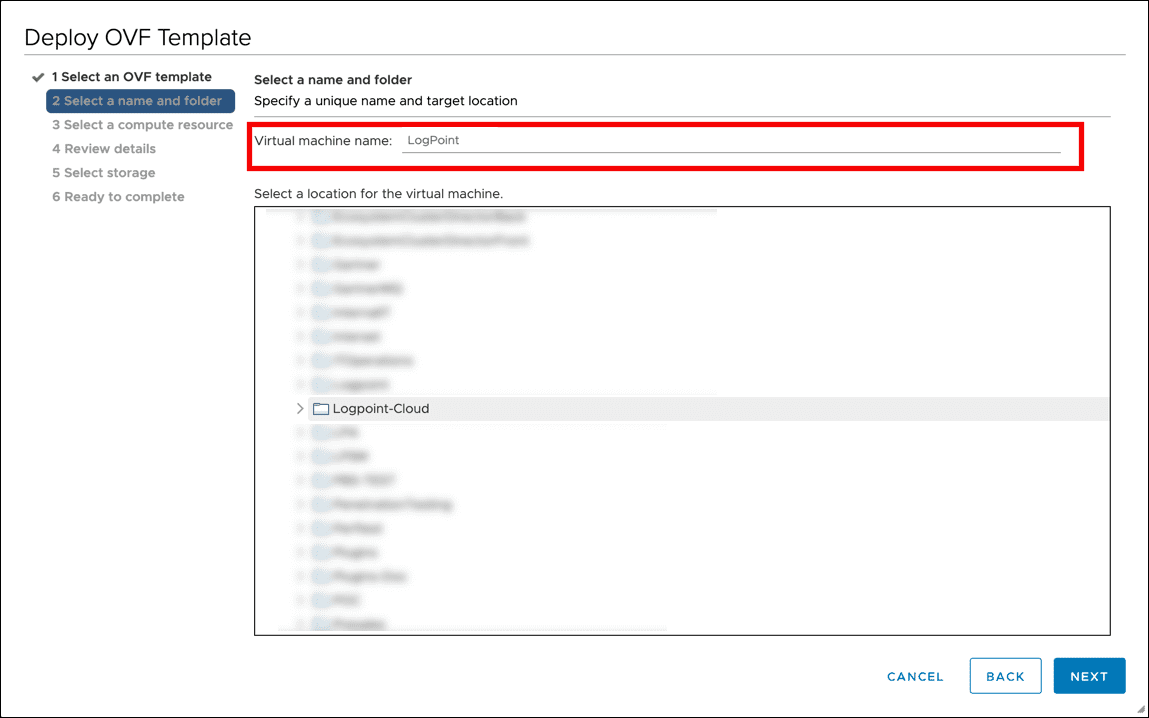
Selecting a Name and Folder
Enter a Virtual machine name.
Select a target location for the virtual machine.
Click Next.
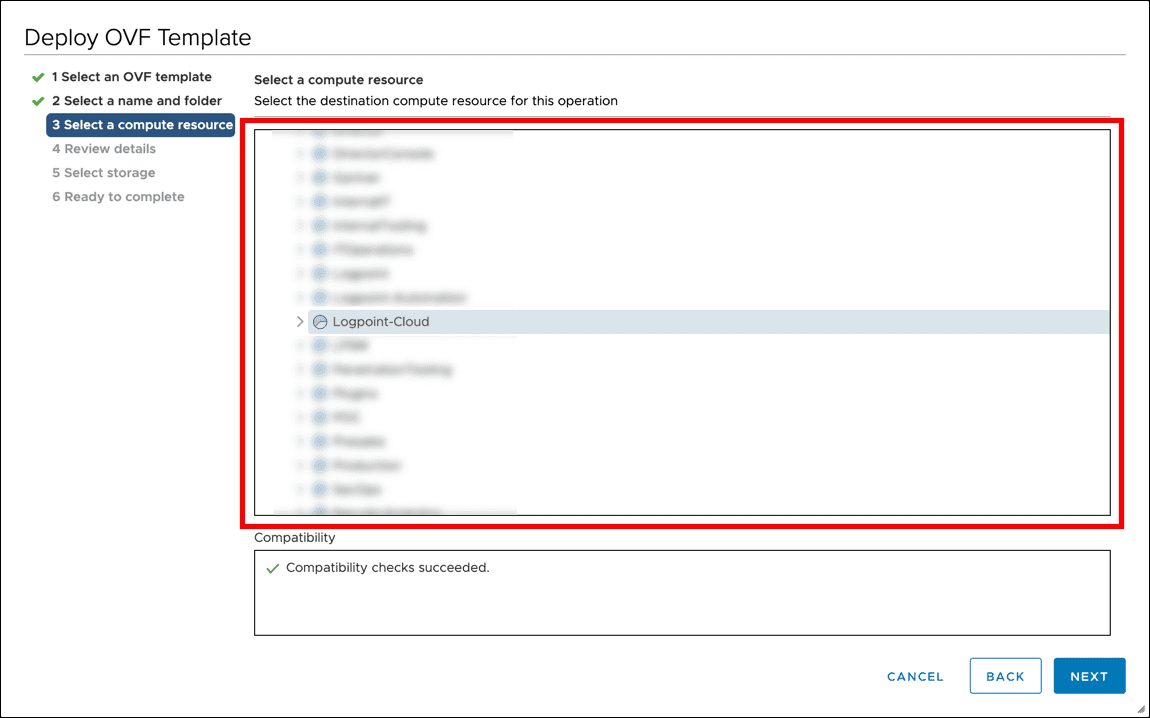
Selecting a Computing Resource
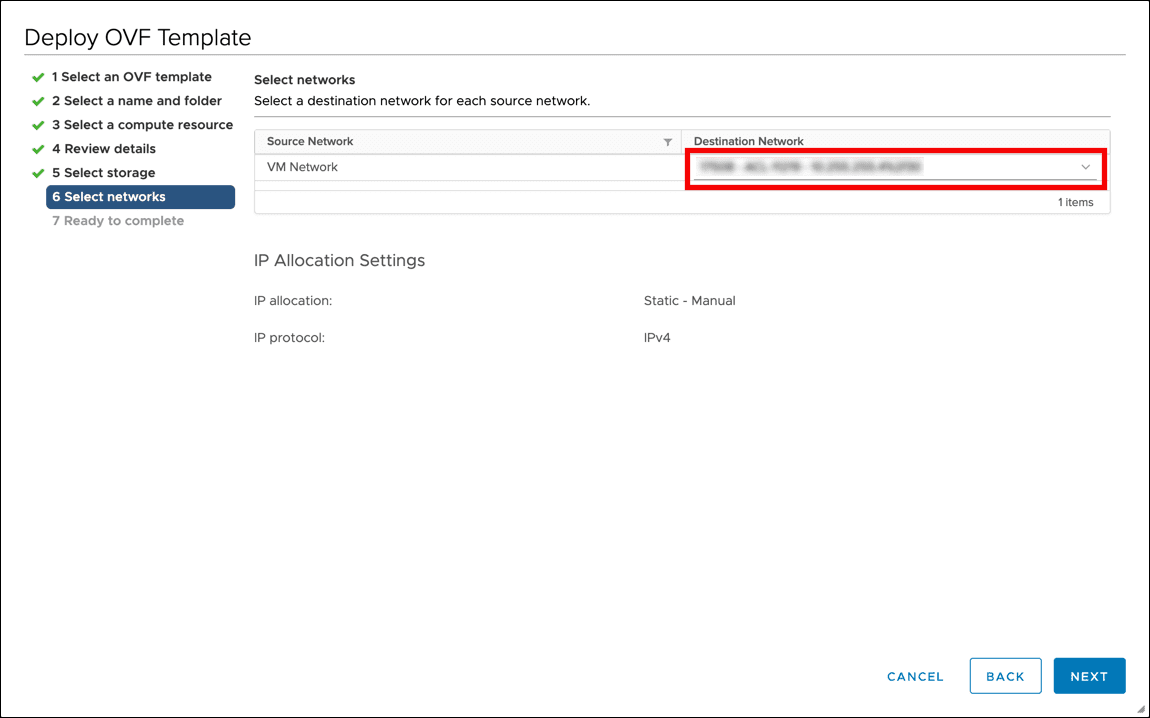
Select the destination resource for the virtual machine.
Click Next.
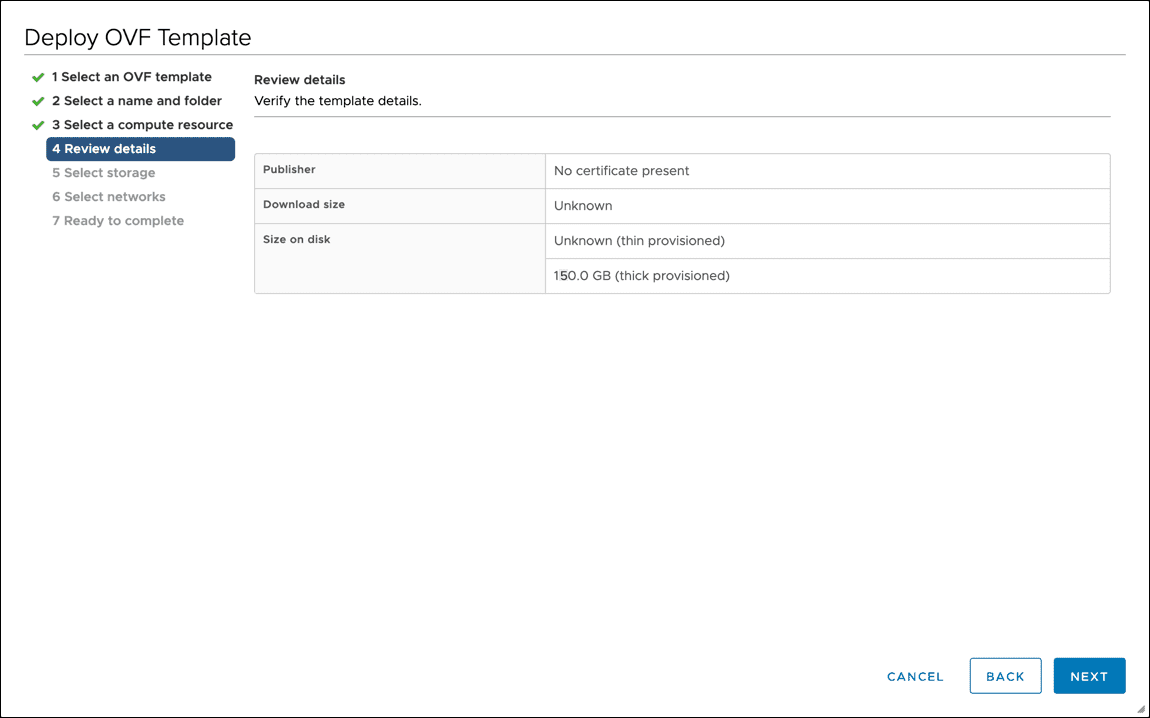
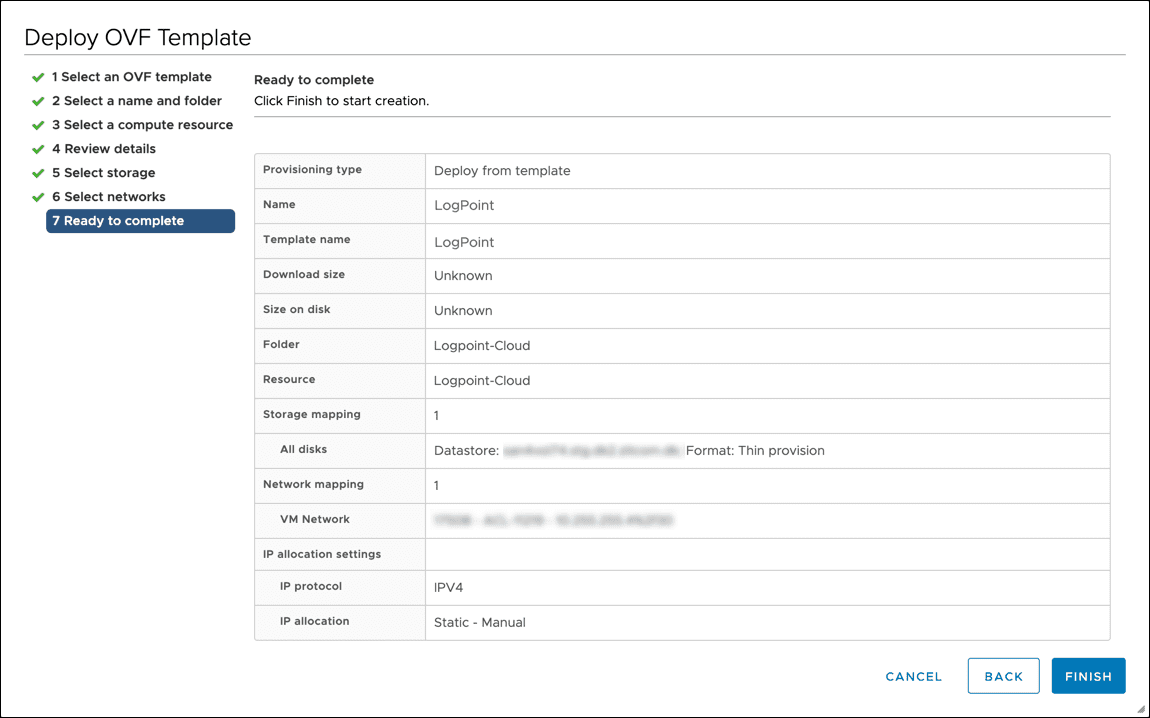
Reviewing the Template Details
Review the details of the OVA. The default configurations of the OVA are as follows:
CPU |
Minimum Quad-core |
Memory |
Minimum 8 GB |
Disk |
150 GB |
These are the minimum requirements to launch and run Logpoint virtual machines in the VMware vCenter Server.
Click Next.
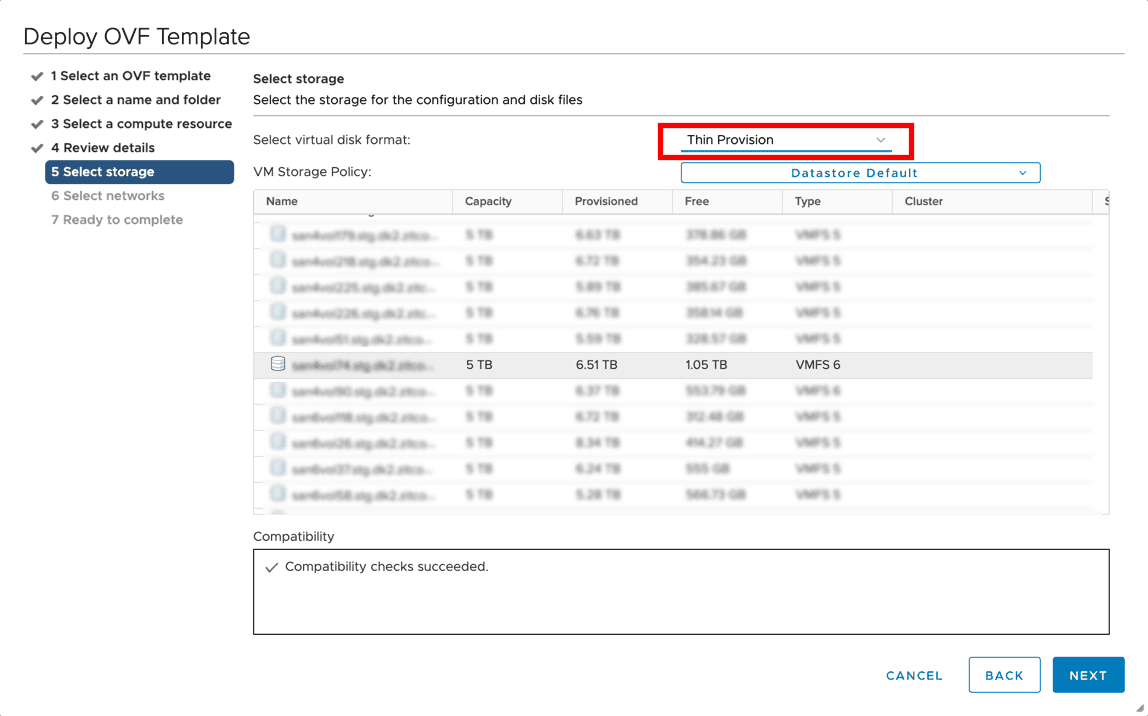
Selecting Storage
Select the virtual disk format. The format can be the Eager Zeroed Thick Provision, Lazy Zeroed Thick Provision, or Thin Provision.
Select the Eager Zeroed Thick Provision format to allocate the storage and clear all the data inside the disk array immediately.
Select the Lazy Zeroed Thick Provision format to allocate the storage immediately, and clear all the data of the disk array only on demand.
Select the Thin Provision format to allocate the storage and clear the data of the disk array only on demand.
Select a VM Storage Policy from the drop-down.
Select a datastore to deploy the virtual machine.
Click Next.